Sending and Receiving Templates
Templates serve as blueprints for products. The template and the new product may be understood as an original and a copy. After a copy is created, it is independent from the original. This means that it can be changed without changing the template, and that it will not be changed when the template is edited.
With the Send Templates and Receive Templates functions you have the option to edit templates and pass these changes on to the associated products.
The following edits will be passed on:
- Changes in format
- Changes in algorithms and logic
- Changes in visibility levels, data type, origin, scaling and economic effect
- Changes in column width
- Changes in column name and ID
- Changes to the time axis
- Deleted and added columns
Note: Data entered into the product manually will not be deleted or overwritten.
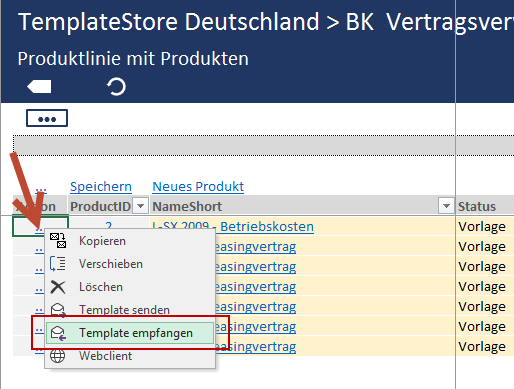
Receiving a Template
For each product, you can define from which template all its settings and logics are to be taken over.
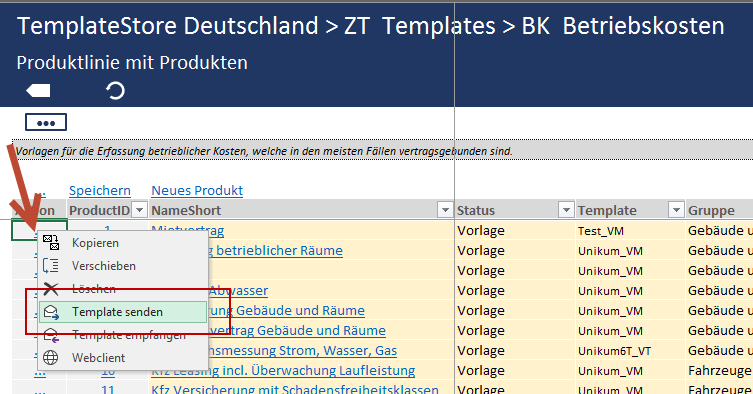
1) Click on the ActionLink of your selected product and select Receive Template.
2) In the opened window, the product which will receive the template is displayed.
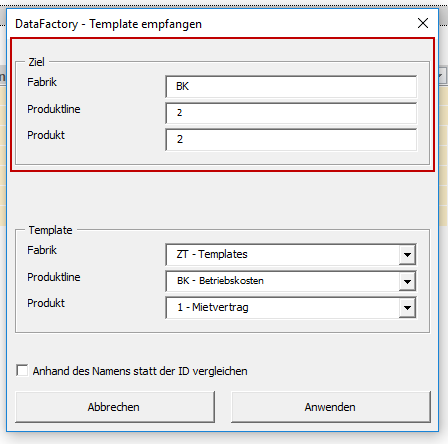
3) Select the template you wish to apply to the selected product via the drop-down menus.
4) In this function, by default, the columns in the template and in the product will be identified based on the column IDs, and the columns with these same IDs are then compared to each other with regard to the changes. Should you wish to execute the identification process based on the column names, check the box Compare by Name Instead of ID.
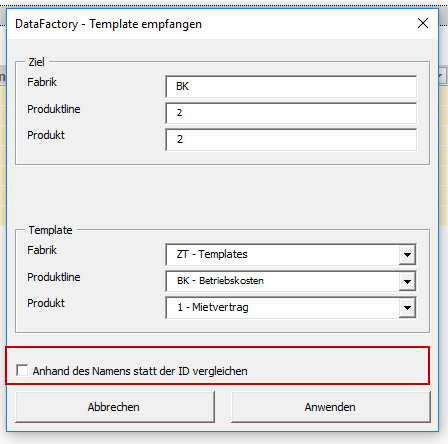
5) Click on Apply. The product has now taken on the properties of the template.

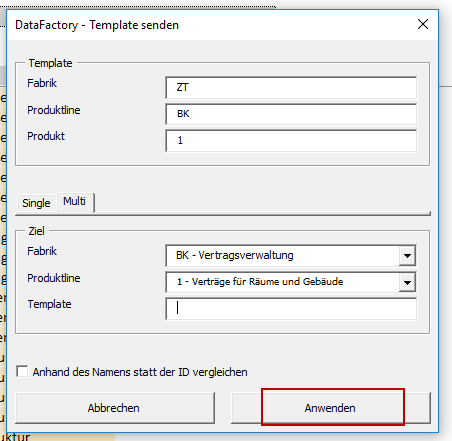
Sending a Template
You may choose a template and apply its properties and logic to one or more products.
1) Click on the ActionLink of your chosen template and select Send Template%%.
2) A window will open displaying the template you have chosen to use as a source.

3) In the tab, choose whether the template is to be applied to one product (Single) or multiple products (Multi).
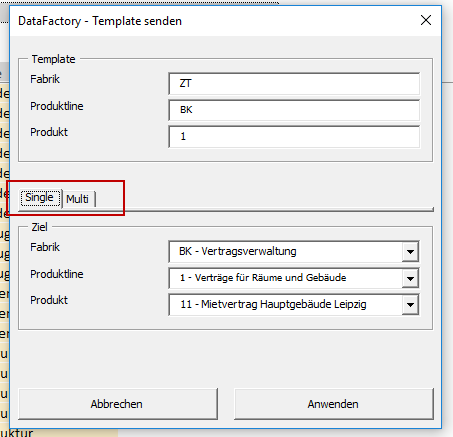
3.1) Should you wish to send the template to a single product, select the product in the drop-down menu of the Single tab.

3.2) Should you wish to send the template to multiple products, open the drop-down menu from the Multi tab. You must then select the factory, product line and template types to which you wish to send the template.
Note: If one of these fields is left empty, it means that all factories, product lines, or template types will be selected. For example, if you enter “BK-Vertragsverwaltung” as a factory but leave the product line and template fields empty, the template will be applied to all products in all product lines of the factory “BK-Vertragsverwaltung”.
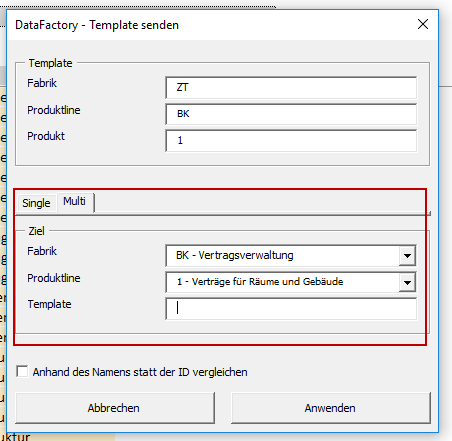
4) In this function, by default, the columns in the template and in the product are identified with regard to the column ID, and the columns possessing the same ID will be compared with each other with respect to their changes. Should you wish to execute the identification process based on the column names, check the box Compare by Name Instead of ID.
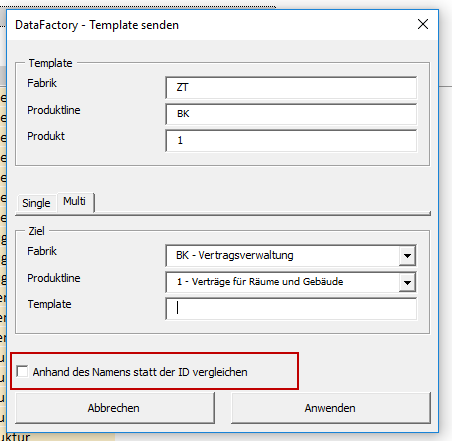
5) Click on Apply. The properties of the template have now been applied to the product.