General Structure
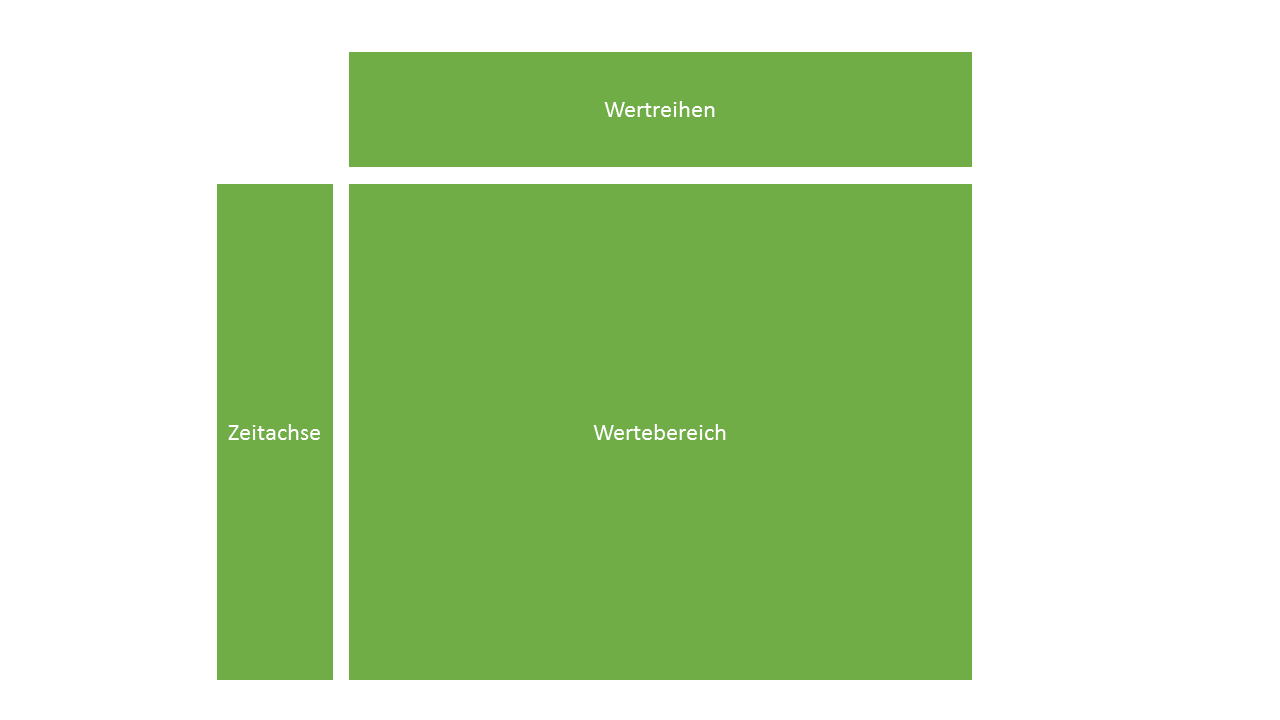
A template consists of three structurally essential elements: the time axis, the value series and the values section.
Time axis
The time axis of a template dictates the degree of detail of the time element of data collection (e.g. on a daily, monthly, yearly etc. basis).

Note: The time axis is not bound to a calendar and is therefore fully customizable.
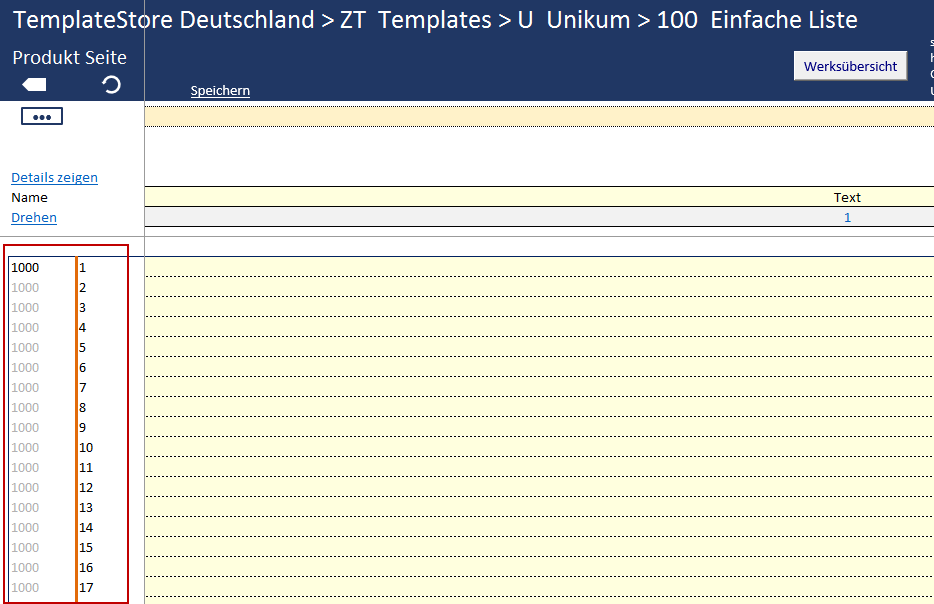
While gathering time-independent data, the time axis becomes a so-called “pseudo-time-axis”, enabling the recording of lists.
Value Series
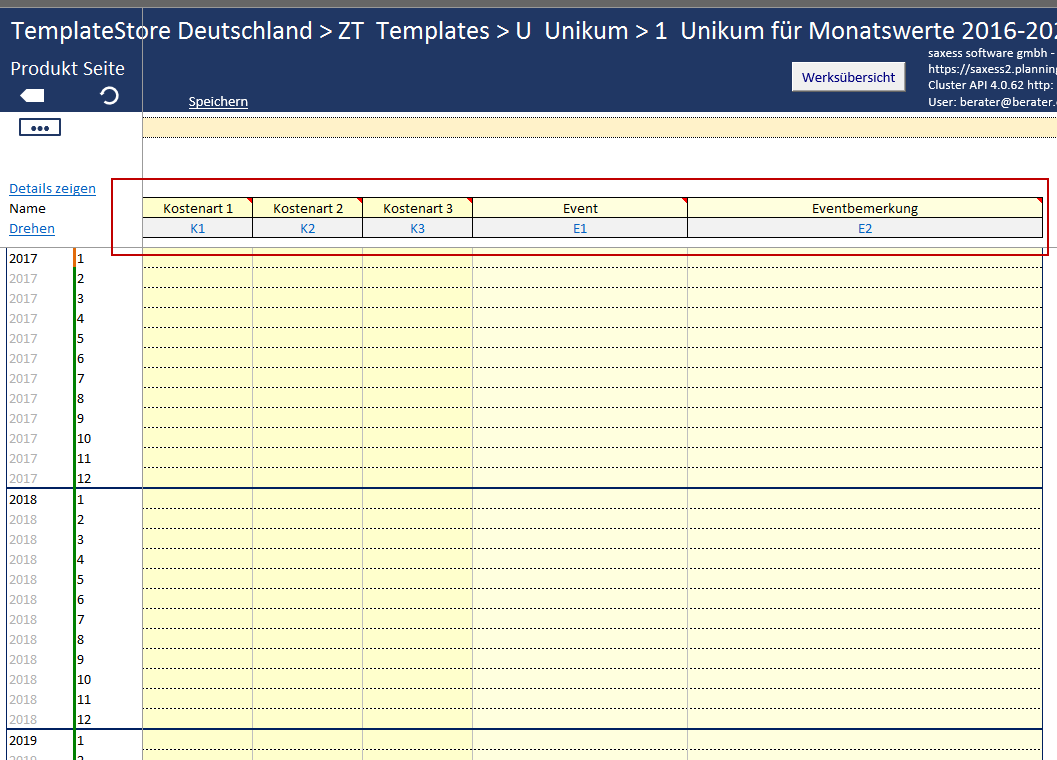
Value series define the characteristics of the values which will be later entered into the values section. The name and ID of a value series are shown in the standard view of a template.
Each value series possesses certain properties and options.
- Number | Sequential number of the series of values (cannot be changed by the user).
- Action | ActionLink enabling the selection of further options.
| Setting | Desciption |
|---|---|
| New before | Adds a new value series before the current value series. |
| New after | Adds a new value series after the current value series. |
| Multiple Copy | Creates multiple copies of the current value series and addsthem at the desired destination. |
| Delete Value Series | Deletes the current value series. |
| Edit IDs | Opens the options dialog to edit IDs. |
| Edit Comment | Opens the comment field on the “Name” cell of the value series. |
| Cut | Cuts out the current value series. |
- Is-Numeric | Indicates whether the entry is a numeric value.
| Setting | Desciption |
|---|---|
| 0 | No, the input is not a numeral. |
| 1 | Yes, the input is a numeral. |
Level of visibility | Offers the option to hide columns during data entry.
Origin | Shows the origin of the values.
| Setting | Desciption |
|---|---|
| Input | Data entry in Excel, no limitations |
| Link | Provides the option to add a link (e.g. to a document or website) |
| XLS | Computes the values with a formula. The Excel formula canbe overwritten and edited at any time. |
| XLS Strict | Computes the vales through a formula. The Excel formula can only be overwritten and edited when the details are open. |
Values List | Allows the user to deposit a list of values that can be selected from the values section via a drop-down menu.
Value Format | Choose from a list of pre-defined value formats. You can pre-define individual formats and select them here.
Unit | Shows which unit willl be assigned to the saved values (e.g. EUR, Kilogram, Kilometer, Percent, Text, USD). You can define new units in the sxUnits list at any time.
Scaling | Shows the scaling in which the values will be saved into the database. This setting only affects numeric values.
| Setting | Description |
|---|---|
| 1 | No decimal places |
| 10 | One decimal place |
| 100 | Two decimal places |
| 1000 | Three decimal places |
| 10000 | Four decimal places |
- Effect | Describes the economic feature, which possesses a value.
| Setting | Description |
|---|---|
| Asset | Value will be added to the balance sheet assets |
| Outpayment | Outpayment only |
| Inpayment | Inpayment only |
| Returns | Return invalid for inpayment |
| Returns=Inpayment | Return valid for inpayment |
| Support Value | Value used only as support for intermediate calculations |
| Costs | Costs invalid for outpayment |
| Costs=Outpayment | Costs valid for outpayment |
| Amount | Displays the amount of change |
| Liabilities | Value will be added to the balance sheet liabilities |
| Quantity | Number detailing quantity |
| Text | Text value |
| Title | Title only |
Parameter | Shows the range of the value series.
Name | Name of the value series. It is recommended to add an informative, descriptive comment to the name to make inputting data easier for the user.
ID | ID of the value series. This can be edited by the user. The ID of the value series must be unique within a work.
The properties and options can be made visible by clicking on the Show details button.

Values Section
The values section is the section in which the concrete data is collected.
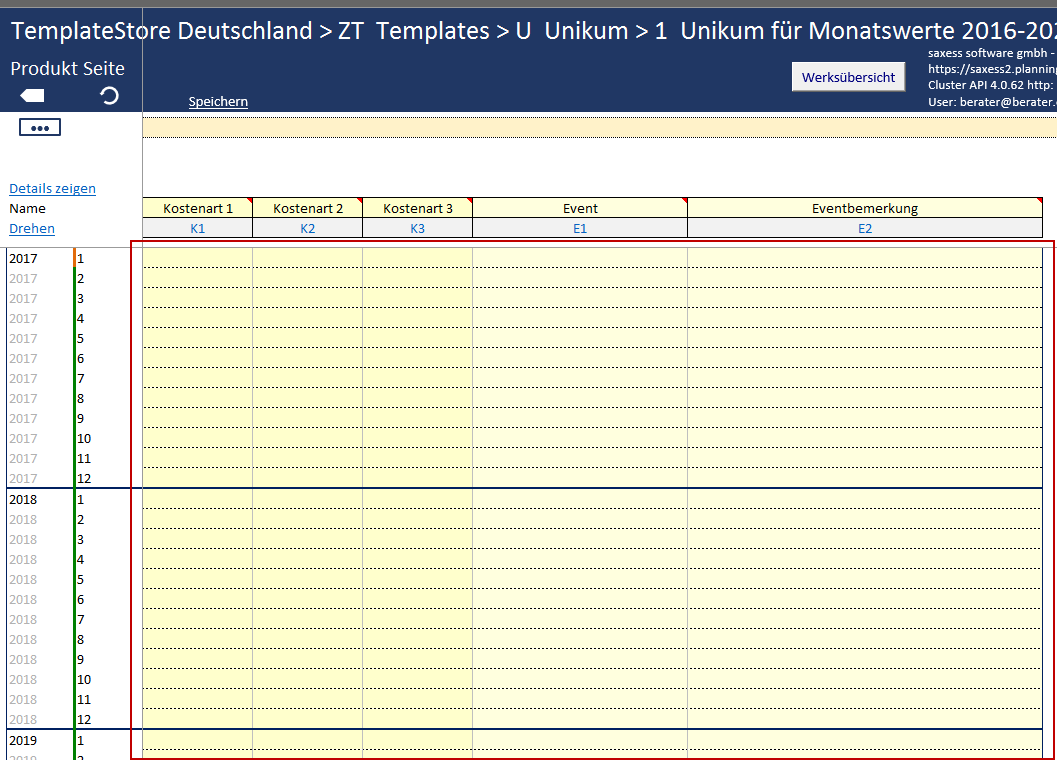
Depending on how the values sections are defined, data can be collected and entered freely. All Excel formulas are supported and can be used.
Note: Formulas will be saved in the value series only when the value series is defined as XLS or XLS-Strict. Otherwise, only the values will be saved.
Orientation and Naming Conventions
A template is oriented either horizontally or vertically. The orientation is based on a naming convention and will be defined through the added suffix.
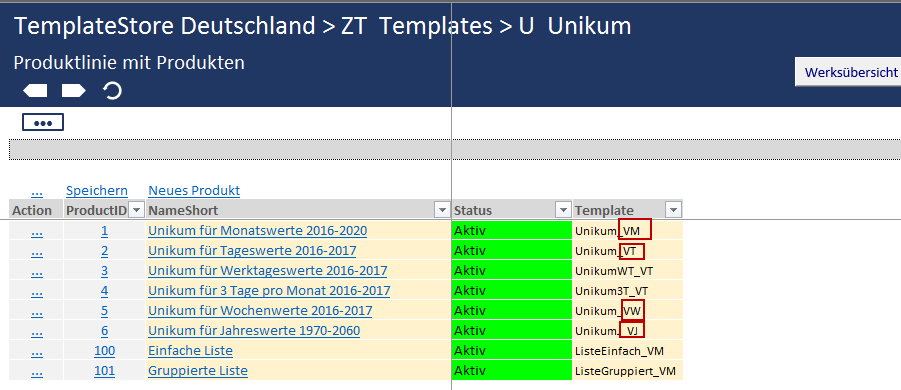
The suffix affects the orientation as well as the time axis and is added to the name of a template with an underscore (_). The first letter defines the orientation, the second letter the detail level of the time axis.
- First letter = V
| Second letter | Suffix | Beschreibung |
|---|---|---|
| T | _VT | Vertical orientation with daily display |
| M | _VM | Vertical orientation with monthly display |
| J | _VJ | Vertical orientation with yearly display |
| N | _VN | Vertical orientation with no time axis |
- First letter = H
| Zweiter Buchstabe | Suffix | Beschreibung |
|---|---|---|
| T | _HT | Horizontal orientation with daily display |
| M | _HM | Horizontal orientation with monthly display |
| J | _HJ | Horizontal orientation with yearly display |
| J | _HN | Horizontal orientation with no time axis |
Note: The choice of time axis display affects the way each single column will be presented. In the daily display, the last day of each month will be separated from the first day of the next month by a thick line. In the monthly display the last month of each year will be seperated from the first month of the following year in the same way.

Rotating the Template
The template can be rotated at any time. This can be in the template itself, or through a change in the naming convention.
In the template itself you can switch between vertical and horizontal view by clicking the Rotate button. However, saving is only possible in the view governed by the naming convention.

The orientation of the template can also be changed in the product overview by changing the naming convention. In the Template column, replace the first letter of the suffix with the desired letter and click on Save. This change is permanent.
